Most homeowners check the shingles and call it done. The shingles are the one part that’s almost always fine. What goes wrong sits at the edges and under the surface: a reused pipe boot, a missing drip edge, flashing that got caulked back down instead of replaced, or soffit vents buried under insulation. After a new roof is installed, walk four zones before you sign off on the job. The ground. The roof surface. The edges and penetrations. The attic. Then wait for the first real storm and check again.
A post-installation roof inspection is a check of a newly installed roof to confirm the work meets the manufacturer’s specs and local code. It looks at the shingles, flashing, drip edge, pipe boots, ventilation, and cleanup, plus the warranty paperwork. A set of eyes that didn’t install the roof gives you the most honest read.
Start On the Ground the Day the Crew Leaves
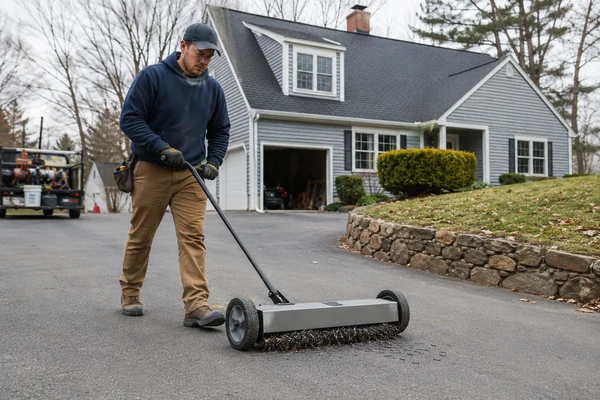
The first check doesn’t need a ladder. Walk the perimeter of the house the day the crew packs up. Look for roofing nails in the driveway, the grass, and the flower beds. A good crew runs a magnetic sweep over the lawn and driveway to pull up stray nails. On our jobs that sweep happens before we take final photos and do the walkthrough with you. Check for shingle scraps, torn underlayment wrappers, and old flashing left in the bushes. Look in the gutters for piles of granules or nails. Check your plants, the AC unit, and the fence for drop damage. If you have kids or pets, do this before anyone goes out back. Stray nails puncture tires and bare feet, and it’s the most common complaint I hear about crews that rush from one job to the next.
How Do You Know if Your Shingles Were Installed Right?
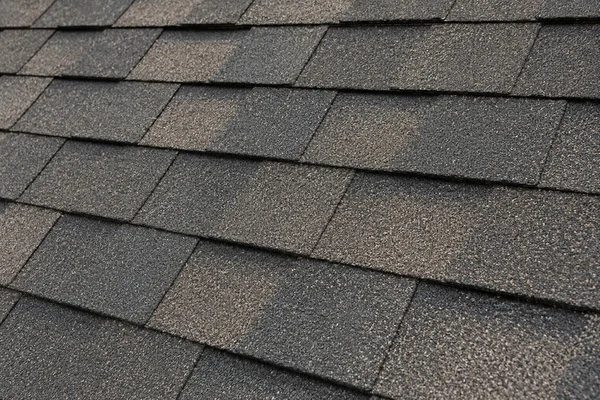
From the ground with binoculars, or from a ladder at the edge, the shingles should lie flat and run in straight lines. Look for lifted corners, buckling, or a wavy surface, which point to a bad deck or hurried nailing. The colors should blend across the whole roof. Asphalt shingles ship in lots, and a careful installer mixes bundles so you don’t end up with a patchy look. Here’s the part most people miss: exposed nail heads. On a correct install, each nail sits under the next course, hidden and sealed. Any nail you can see on the shingle face is a leak waiting to start. We install GAF Timberline HDZ shingles, which have a wide nailing strip, but the crew still has to hit it and use enough nails. Ask how many nails per shingle they used. Four is the old standard. GAF wants six nails per shingle for the stronger wind coverage, and near the coast in New Bedford or Fall River you want those six.
Don’t Skip the Edges and Penetrations
This is where installs actually fail. Start with the drip edge, the metal strip along the eaves and rakes that sends water into the gutter instead of behind it. Massachusetts code calls for it, and a cheap crew skips it. You should see a clean metal edge tucked under the first row of shingles. Next, the starter strip. A real starter course, like GAF Pro-Start, seals the first row against wind; if the bottom edge is just upside-down field shingles, that’s a shortcut. Then the flashing. Where the roof meets a wall, a chimney, or a skylight, you want new metal flashing, not the old flashing bent back and sealed with a tube of caulk.
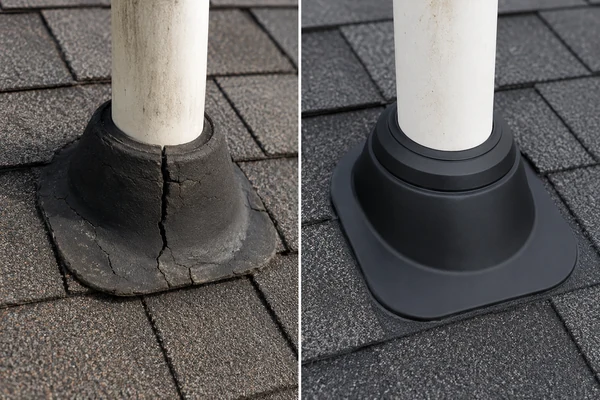
Which brings up the check almost nobody knows to make. The pipe boots. Those are the rubber collars around the plumbing vent pipes sticking out of your roof. They cost about $15, and a rushed crew reuses the old cracked ones to save ten minutes. A reused pipe boot is the single most common leak I find on a “new” roof. Ask for a photo of the new boots, or look for bright, uncracked rubber with a clean metal base. While you’re at it, the valleys where two slopes meet should be clean metal or a tight woven pattern, with no nails showing.
What Should You Check for Attic Ventilation?
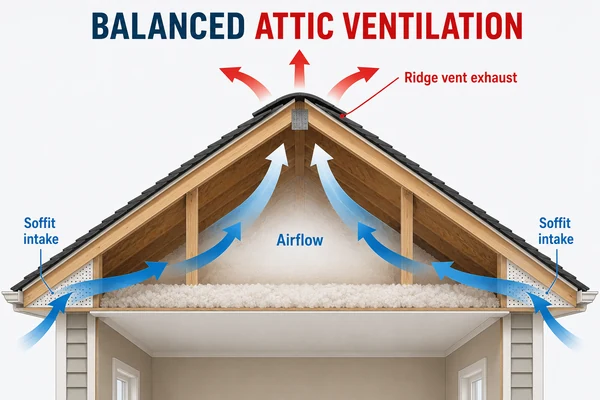
Go into the attic on a hot afternoon and again on a cold morning. It should feel close to the outside air, not like an oven or a damp basement. A roof needs balanced airflow to last: intake vents low at the soffits, and exhaust high at the ridge. The Federal Housing Administration guideline is one square foot of vent for every 300 square feet of attic floor, split evenly between intake and exhaust, and the U.S. Department of Energy backs the same balanced setup. We run GAF Cobra ridge vents at the peak and confirm the soffits are open, because this is what gets missed most: insulation blown over the soffit vents chokes the intake, and the ridge vent then pulls air from inside the heated house.
Feel for airflow at the soffits. Look toward the ridge from inside and make sure nothing is blocking it. This matters more than the shingle brand you picked. Weak ventilation shortens shingle life and can void the manufacturer warranty, so the vents deserve as much attention as the shingles on top.
Why the First New England Storm Is the Real Test
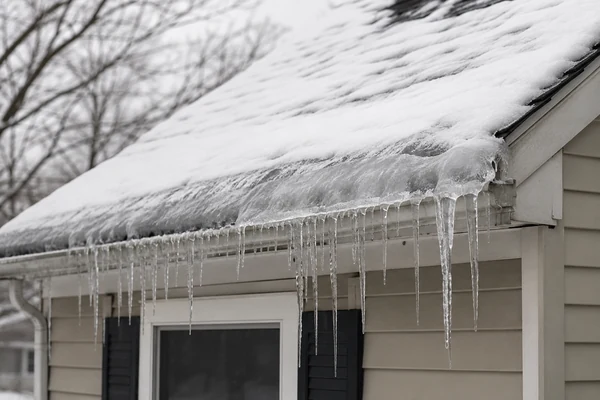
A roof can pass a sunny-day look and still leak. The first hard rain and the first snow are the honest tests, and in Massachusetts you get plenty of both. After the next big storm, go back into the attic with a flashlight. Look for water stains on the deck, wet insulation, or drips near the chimney, the valleys, and the vent pipes. In winter, watch the eaves for ice dams, the ridges of ice that build up when heat leaking into the attic melts snow that then refreezes at the cold edge. Ice dams are a ventilation and insulation problem as much as a roofing one. The real fix is air sealing, proper attic insulation (R-49 to R-60 for our climate zone), and the balanced venting above.
This is also why we run a GAF WeatherWatch ice and water barrier along the eaves and in the valleys on New England roofs. It’s the last line of defense when an ice dam pushes water back up under the shingles. If you spot stains after one storm, or you think a big storm did damage, call your installer that week, not next season.
What Paperwork Should You Get After a Roof Replacement?
You should walk away from the job with a folder, not a handshake. There are two warranties, and people mix them up. The manufacturer warranty covers the materials. GAF’s shingle warranties run for decades, and a full GAF system install can carry up to 50-year coverage. The workmanship warranty covers the labor, meaning if the crew put something on wrong, someone fixes it for free. Get both in writing, and ask exactly how long the labor warranty lasts, because that’s the one a cheap contractor keeps short and quiet.
Some manufacturer warranties have to be registered within 45 days of installation, or you drop to the basic coverage, so get the registration confirmation in hand. You also want the final invoice marked paid, the closed building permit, a lien waiver if a subcontractor did part of the work, and the crew’s photos of the deck, underlayment, and flashing from before the shingles went down. Those photos are your proof of what’s actually under the roof, which matters as much on a new install as it does on a full roof replacement. Powersol Roofing backs its installs with a workmanship warranty and a GAF system warranty, and we hand over the stage-by-stage photos on every job.
What to Do if You Find a Problem
Don’t panic, and don’t let it slide. Take clear, dated photos and write down what you see and when. Call the company that installed the roof first. A real workmanship warranty means the fix is on them, not on your wallet. Most small issues, a lifted shingle, a missed sealant spot, a nail that needs covering, are a quick return visit. If the installer stops calling you back, that’s when a homeowner is stuck, and it’s the reason I tell people to check the labor warranty before they sign, not after. A third-party roofer can document the problems and make the repairs to keep your manufacturer warranty intact. We do that for homeowners who got left hanging by another crew, whether the job was in Taunton, Randolph, or Dorchester.
Your New-Roof Punch List
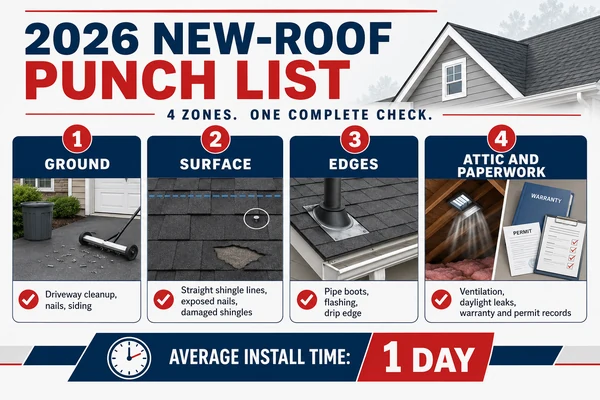
Run these four zones and you’ll catch almost everything a homeowner can catch without walking the roof:
- Ground: no nails in the driveway or lawn, magnetic sweep done, old flashing and debris hauled off, gutters clear, landscaping undamaged.
- Roof surface: shingles flat and in straight lines, colors blended, no exposed nail heads, six nails per shingle in wind zones.
- Edges and penetrations: drip edge at eaves and rakes, a real starter strip, new flashing at walls and chimney, new pipe boots (not reused), clean valleys.
- Attic and paperwork: balanced intake and exhaust, open soffits, no daylight gaps or leaks after a storm, both warranties in writing, permit closed, install photos in hand.
Most standard roof replacements go on in one to two days, and our average is a single day, so you can usually run the ground and edge checks the same evening the crew pulls out.
Getting a Second Opinion on Your New Roof
If your roof was just installed and something feels off, or the crew that did it has gone quiet, a fresh set of eyes helps. A roofer who didn’t swing the hammer has no reason to defend the work. Powersol runs honest roof inspections across Greater Boston, the South Shore, and the South Coast, and we’ll tell you straight if the job was done right, because we’d rather keep a customer than sell a repair you don’t need. If you’re still deciding who should handle the new roof installation in the first place, that same standard is how we’d treat your house. Knowing what to check after a new roof is installed is how you protect one of the biggest things you’ll ever buy for your home.
FAQ
What should I check after a new roof is installed?
Check four zones: the ground for stray nails and debris, the roof surface for flat, well-nailed shingles, the edges for drip edge, flashing, and new pipe boots, and the attic for balanced ventilation and leaks after the first storm. Then confirm your warranty paperwork is in writing.
What are signs of a bad roof installation?
The clearest signs are exposed nail heads on the shingle face, reused or cracked pipe boots, no drip edge, old flashing caulked back into place, buckling shingles, and stray nails left in the yard. Any of these is worth a call to the installer.
How long does a roofing warranty last?
Two clocks run at once. Manufacturer material coverage from GAF runs for decades and can reach 50 years on a full system install. Labor, or workmanship, coverage varies by contractor, so ask for the exact number of years in writing before you sign.
Do roofers replace the pipe boots on a new roof?
They should. The rubber boots around your vent pipes cost about $15 each and crack with age, but a rushed crew often reuses the old ones. A reused pipe boot is one of the most common leaks on a newly installed roof, so ask for photos of new boots.
How long does a new roof take to install?
Most standard roof replacements go on in one to two days once the material is delivered and the weather holds. At Powersol our average install is a single day, which means you can walk the ground and edge checks the same evening.
Should a new roof be inspected by a third party after installation?
Yes, especially if it’s your first time with that roofer or something looks off. A third-party inspector has no reason to defend the work, so you get an honest read on the shingles, flashing, pipe boots, and ventilation before small issues turn into leaks.
Does attic ventilation affect my roof warranty?
It can. Weak or unbalanced ventilation traps heat and moisture, shortens shingle life, and can void the manufacturer warranty. Aim for one square foot of vent per 300 square feet of attic floor, split evenly between soffit intake and ridge exhaust.